Using NoMAD Login With Jamf DEP Workflows
NoMAD Login is a login window replacement for macOS that allows you to authenticate to Active Directory to create a local account mirroring AD credentials. It’s often used in conjunction with NoMAD as a way to access AD features without requiring an actual bind. One of the most popular use cases is provisioning local accounts as part of a DEP deployment workflow. This post will cover how to accomplish such a workflow using Jamf Pro.
DEP Setup Assistant and PreStage Enrollment Settings
Oh DEP. We need you to work. Sometimes you work. Whether DEP is having an off day or not, Apple has seemingly ignored something that makes life in IT easier - consistency. As of writing this there are three account options built into setup assistant.
- Create an administrator account.
- Create a standard account.
- Skip account creation.
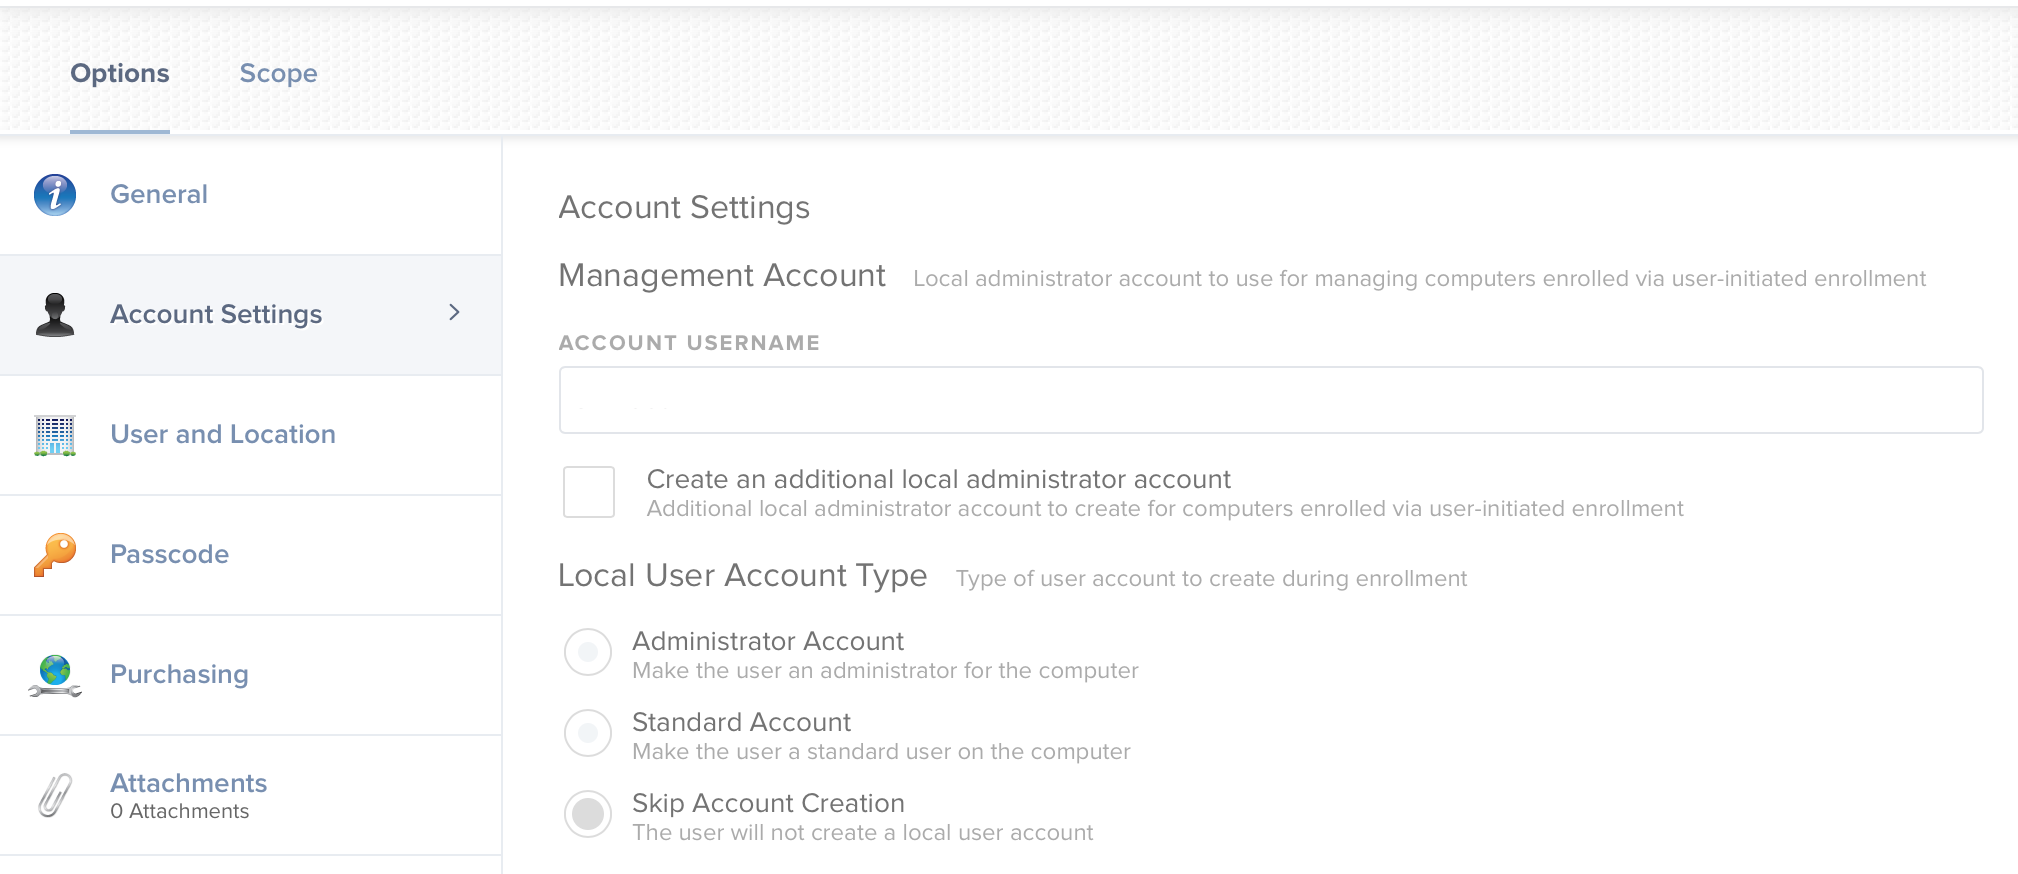
Options one and two sound great, but some quick testing shows users are able to create an account by whatever name they choose. There’s no setting to force accounts to meet a standard naming convention or match an organization’s LDAP or other identity provider. This is where NoMAD Login and skip account creation come into play. Let’s take a look at Jamf prestage enrollment settings. Under account settings a management account must be defined and skip account creation option selected. The goal end state is to end up at the login window with only the management account created. NoMAD Login will then take over and a user will authenticate to AD, resulting in a local account matching their AD account.
I also recommend disabling General > Require Authentication since the user will already be asked to authenticate at NoMAD Login as proof they have valid credentials. If you were using this in the past to assign devices to users the same function can be easily replaced by adding a recon command in a script post-login.
#!/bin/bash

user=$(python -c 'from SystemConfiguration import SCDynamicStoreCopyConsoleUser; import sys; username = (SCDynamicStoreCopyConsoleUser(None, None, None) or [None])[0]; username = [username,""][username in [u"loginwindow", None, u""]]; sys.stdout.write(username + "\n");')
jamf recon -endUsername "$user"

Creating the Package
NoMAD Login comes in a .zip with two flavors of installer package - one with authchanger and one without. authchanger is a small Swift utility which changes the authorization database to include NoMAD Login’s mechanisms. If you’ve never peeked under the hood before open Terminal and run…
security authorizationdb read system.login.consoleThose are the default mechanisms, in order, which run at the login window. If you were to then install the authchanger flavored package and run the same command there would be new mechanisms which are the core of what make NoMAD Login work.
NOTE: Only run authchanger on a test machine until comfortable with login window plugins. Otherwise it’ll be tough to get back to a working state later.
<?xml version="1.0" encoding="UTF-8"?>
<!DOCTYPE plist PUBLIC "-//Apple//DTD PLIST 1.0//EN" "http://www.apple.com/DTDs/PropertyList-1.0.dtd">
<plist version="1.0">
<dict>
    <key>class</key>
    <string>evaluate-mechanisms</string>
    <key>comment</key>
    <string>Login mechanism based rule.  Not for general use, yet.</string>
    <key>created</key>
    <real>520882179.73855001</real>
    <key>mechanisms</key>
    <array>
        <string>builtin:policy-banner</string>
        <string>NoMADLoginAD:CheckAD</string>
        <string>builtin:login-begin</string>
        <string>NoMADLoginAD:PowerControl,privileged</string>
        <string>NoMADLoginAD:CreateUser,privileged</string>
        <string>NoMADLoginAD:DeMobilize,privileged</string>
        <string>builtin:reset-password,privileged</string>
        <string>builtin:forward-login,privileged</string>
        <string>builtin:auto-login,privileged</string>
        <string>builtin:authenticate,privileged</string>
        <string>PKINITMechanism:auth,privileged</string>
        <string>builtin:login-success</string>
        <string>loginwindow:success</string>
        <string>loginwindow:FDESupport,privileged</string>
        <string>HomeDirMechanism:login,privileged</string>
        <string>HomeDirMechanism:status</string>
        <string>MCXMechanism:login</string>
        <string>CryptoTokenKit:login</string>
        <string>loginwindow:done</string>
        <string>NoMADLoginAD:EnableFDE,privileged</string>
        <string>NoMADLoginAD:SierraFixes,privileged</string>
    </array>
    <key>modified</key>
    <real>520882179.73855001</real>
    <key>shared</key>
    <true/>
    <key>tries</key>
    <integer>10000</integer>
    <key>version</key>
    <integer>6</integer>
</dict>
</plist>
Note those mechanisms prepended with NoMADLoginAD. Now authchanger is fine, but it doesn’t give us a way to revert back to defaults once we’re done with NoMAD Login. We also still need a way to set preferences.
To solve this, I have an AutoPkg recipe up at https://github.com/autopkg/nstrauss-recipes/tree/master/NoMADLoginAD. If you haven’t already done so install the vanilla package without authchanger and then check /Library/Security/SecurityAgentPlugins/NoMADLoginAD.bundle exists. You’ll need it to create our customized package.
Clone or download the recipe, open /scripts/postinstall in your favorite text editor, and edit variables to change preference keys as needed. A reference can be found here: https://gitlab.com/orchardandgrove-oss/NoMADLogin-AD/wikis/Configuration/preferences. Not all keys are included since I don’t use them in production. For example, if you need FileVault take a look at EnableFDE.
A few things to point out in the postinstall. I’m choosing to use defaults commands over a profile because Jamf still does not support await configuration. Without spinning off into a broader tangent, await configuration is a DEP feature which - yes - waits for a defined configuration to complete before moving on. Things like profiles and applications can be installed during this phase. However, without it there’s no reliable way to determine if those things will be installed before NoMAD Login launches. defaults commands work to set preferences as advertised when run. This is the same reason the postinstall script ends with killall.
killall -HUP loginwindowIn most cases the login window will pop before a machine gets the Jamf binary which in turn means before policies can run to install packages. Killing login window forces the process to re-launch at which point NoMAD Login takes over.
If you feel strongly about Jamf adding await configuration support please make your voice heard by upvoting this feature request. Bugging your Jamf contacts as much as possible doesn’t hurt either.
Jamf Policy Setup
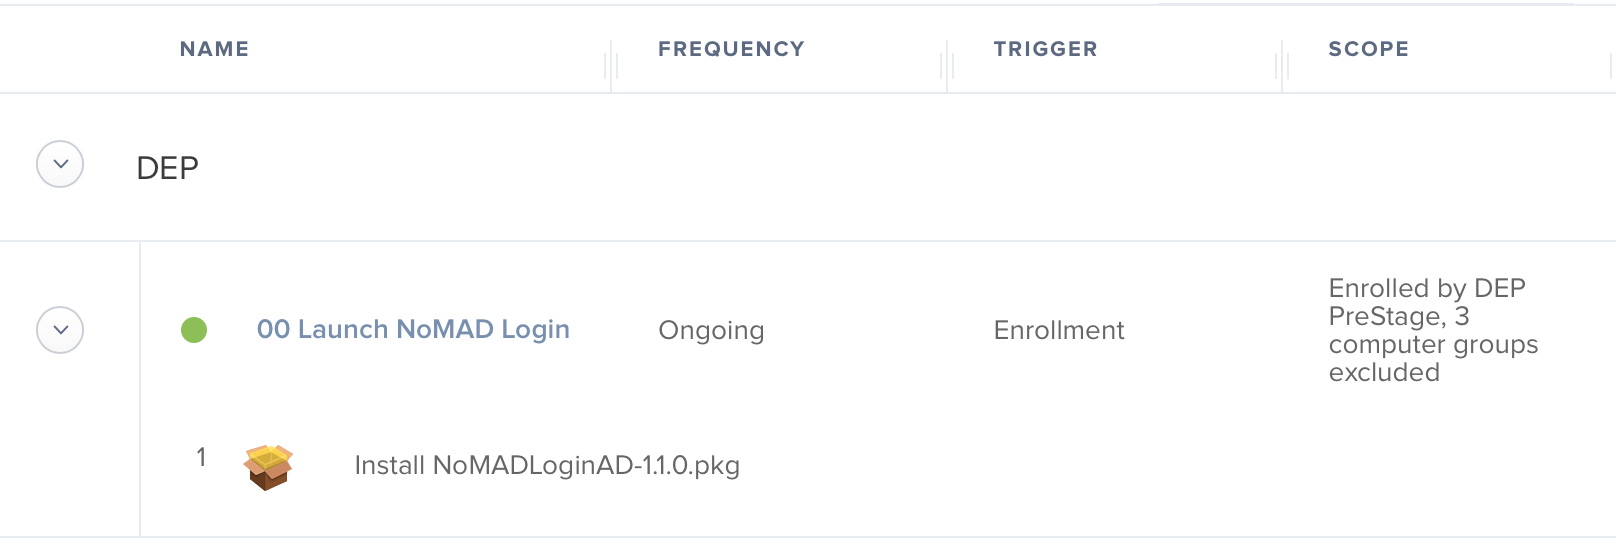
Now that we have a custom package generated it needs to be deployed through a policy. The most important bits here are the policy be triggered on enrollment complete and it be named in such a way to kick off first. Jamf policies run in alphanumeric order which is why mine begins with 00.
Cleanup
This workflow really only deals with one time user provisioning. It is possible, and a valid use case, to keep NoMAD Login as a permanent login window replacement, but that’s not the goal here. In this scenario users interact with it once, and then subsequently use the default login window.
The good news is our postinstall script from earlier made an authorization database backup. The snippet below writes the default mechanisms back in place and then removes all traces of NoMAD Login. I make an assumption you’re already using a deployment script this can be tacked onto.
#!/bin/bash

security authorizationdb write system.login.console < /private/tmp/evaluate-mechanisms/console.bak
rm -rf "/private/tmp/evaluate-mechanisms/"
rm -rf "/Library/Security/SecurityAgentPlugins/NoMADLoginAD.bundle"
All Together Now
If everything worked as planned the process should go something like in the video below.
Mac boots > DEP setup assistant > NoMAD Login > local user desktop > NoMAD Login removed
Any questions please join us on MacAdmins Slack in #nomad-login.